Kamis, 28 Maret 2013

Zhang Wuyi 38 tahun, adalah seorang pekerja mesin tekstil pabrik di Wuhan, Provinsi Hubei.setelah PHK tahun 2008 mulai membuat kapal selam, menjual semua barang miliknya, serta meminjam uang demi membuat kapal selam. Menghabiskan uang 300 juta yuan, setelah beberapa kali gagal, akhirnya menghasilkan jenis cetakan kapal selam sipil.

Tanggal 26 Maret Zhang mencoba kapal selam buatannya dikolam tertutup. Kapal selam sipil ini rencannya akan dioperasikan untuk kegiatan mancing dilaut, Sebuah hasil karya yang patut dipuji oleh banyak orang lulusan akademik. Itulah contoh hasil karya iptek yang dibuat oleh orang sipil negara lain.


Walau cuma mantan karyawan pabrik tekstil seseorang bisa menciptakan sesuatu yang harusnya bisa dilakukan lulusan perguruan tinggi. Kenyataan Ironis yang bisa kita lihat dinegeri indonesia ini, diamana seseorang mengejar perguruan tinggi hanya ingin mendapatkan gelar sarjana, dan hanya untuk mengejar posisi puncak pencari uang. Menjadi PNS adalah target kebanyakan orang dinegeri ini. Mendapatkan jabatan tinggi demi gengsi adalah tuhuan utama.

Dimana pengabdian akan ilmu yang ditempa diperguruan tinggi. Dimana karyamu? banyak profesor, sarjana tehnik, dan sarjana sarjana bonafit lainnya, Jangan kita kalah dengan penduduk negeri lain seperti cina, walau menurut kita membajak karya orang lain tapi setidaknya mereka bisa menciptakan banyak barang yang kita gunakan disini, ambil contoh handphones cina atau cell phones cina, tablet buatan cina atau produk apa saja yang beredar dan kita gunakan disini, semua tidak diciptakan oleh lulusan sarjana. Kalau boleh bicara, apa ada lulusan universitas di Indonesia yang sudah bisa buat handphone?
hp android buatan cina

Yang banyak dipasaran indonesia malahan banyak buatan negeri lain. Handphone cina, tablet-pc cina, ponsel android cina, notebook cina. Lihat contoh ponsel android buatan cina yang mirip dengan produsen pabrik terkenal lainnya. Samsung galaxy tab yang mirip banget dengan aslinya, begitu juga blackberry cina dan produk elektronik serta spare part lainya, yang lainnya yang dikembangkan orang rumahan dan pabrikan.

tablet-pc buatan cina

Kebanyakan penjual dipasar loak inodnesia adalah "tukang sulap", barang yang dijual barang tipu tipu, barang jelek dicat ulang atau ditambal sulam lalu dicat lagi biar keliatan baru. Barang second dibilang baru, barang palsu dibilang asli. Walau tidak semua pedagang. Mana yang lebih baik, barang kualitas kurang bagus dijual murah tapi baru seperti produk cina, dengan barang jelek disulap jadi baru dijual dengan harga barang asli yang mahal?

Kapan ada handphone buatan indonesia, tablet-pc buatan Indonesia? postingan admin cybermales difokuskan untuk generasi muda, biar bisa dijadikan spirit dan semangat untuk kemajuan generasi muda dan bangsa ini. Tuntutlah ilmu walau sampai kenegeri cina sekalipun dan pergunakan ilmu biar bermanfaat untuk orang banyak. STOP jika tujuan Kuliah cuma biar bisa jadi PNS, pejabat tinggi yang hebat, anggota militer, apalagi sogok menyogok demi lulus jadi PNs atau militer demi jabatan dan dihargai orang banyak.

Kemuliaan seseorang bukan karena jabatan, pangkat, seragam, atau posisi tinggi tapi kerendahan hati dan Tapi berbuat kebajikan dan berguna untuk orang banyak adalah sedekah dunia akhirat. Kesombongan adalah rasa rendah diri yang ditutup tutupi.
Rabu, 26 Desember 2012

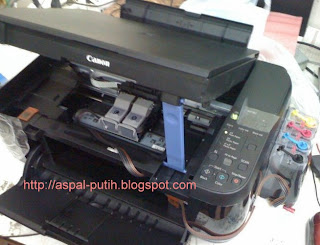
Low ink warning harusnya menandakan kalau tinta printer canon Seri Mp145 mp150 mp287 dan sejenisnya telah hampir habis itu idealnya, tetapi kebanyakan berbeda dengan kenyataan jika cartriedge baru di refill atau isi ulang, metode yang tidak disarankan oleh pabrik tapi banyak diterapkan oleh banyak pengguna printer dimanapun. Lho kok masih LOw ink warning padahal tinta printer baru diisi atau disuntik dan di infus penuh? Walau demikian printer masih tetap bisa mencetak cuma lampu pada panel printer selalu kedap kedip menandakan tinta habis atau low ink warning.

cara mematikan fungsi low ink warning canon

Low ink pada printer canon mp145 dan sejenisnya juga sering terjadi ketika kita habis menjalankan software tools resetter printer. Nah berikut ada tips yang mudah untuk memperbaiki/mendisable/mematikan pesan low ink warning pada printer canon seri MP dan sejenisnya. Mudah bagi yang terbiasa agak repot bagi yang awan tapi yang penting ikutin petunjuk dengan benar dan sedikit sabar:

1.  Copot kabel power printer MP145, Mp150, MP287 dan sejenisnya.
2.  Tekan sambil ditahan tombol power printer MP sobat.
3.  Colokan kembali kabel power printer ( warnanya hitam )
4.  Tekan tombol Stop/Reset sebanyak 2x ( santai gak perlu buru buru waktu menekannya) ingat cukup 2x
5.  Lepas semua jari yang menekan tombol power dan stop/Reset tunggu sejenak lebih kurang 5 sd 10 detik
6.  Nanti pada panel printer akan menunjukan akan 0 ( nol )
7.  Tekan tombol + ( plus ) pada panel printer Canon MP sobat hingga panel menunjukan angka 1
8.  Tekan Tombol Color atau colour
9.  Tekan tombol power sebanyak 2x, printer akan mencetak satu halaman. (pada panel akan menunjukan angka 0 )
10. Buka Cover printer canon MP sobat ( bukan tutup scanner ).
11. Copot kedua cartriedge biarkan cover tetap terbuka
12. Copot kabel power printer ( kabel warna hitam ) pada posisi cover printer masih terbuka.
12. Tutup cover printer canon MP145 atau sejenisnya
13. Colokan kembali kabel power printer
14. Nyalahkan kembali printer
15. Buka cover printer
16. Pasang kembali kedua tinta warna dan tinta hitam printer canon
17. tutup kembali cover tunggu hingga lebih kurang 2 menit printer sampai printer melakukan proses inisialiser
18. selesai, jika lampu kedua tinta pada panel tidak lagi berkedip kedip artinya berhasil.
19. Jika belum berhasil coba ulangi setiap step dengan sabar.

Catatan :

Dalam Proses ini kabel usb printer tidak harus terpasang.
Tips ini hanya untuk mendisable low ink warning atau tanda lampu kedap kedip pada panel printer Mp yang menunjukan tinta habis walau sebenernya tinta baru di refill atau isi ulang,

Selamat mencoba.

Senin, 17 Desember 2012

arti kode blinking dan error printer canon

Error Code Canon IP1300, IP1700, IP1200, IP1880, IP1980 :

3x orange 1x green = mechanical error
4x orange 1x green = absorber full /reset with general tools
5x orange 1x green= cartirdge black/colour has problem
7x orange 1x green = cartirdge black/colour has problem
8x orange 1xgreen = absorber full / reset with general tools
12x / 15x orange 1x green = cartridge detection

Code Blinking Canon :

1.Blingking 2x = Out of Paper or Paper feed error
2.Blingking 3x = Paper Jam
3.Blingking 4x = Ink cartridge was out
4.Blingking 5x = Cartridge unknown
5.Blingking 7x = Position of the Cartridge is not right
6.Blingking 8x = Ink absorber full
7.Blingking 14x = Cartridge unknown

Canon MP Error Code error :

E2-2    = No paper
E3-3    = Paper jam
E4      = No ink  - 
E5-5    = The ink cartridges are not installed or a non-supported ink cartridge is installed, or the                     ink cartridges are not installed properly
E8      = Waste ink absorber full, or platen waste ink absorber full
E9      = The connected digital camera / video camera does not support Camera Direct Printing
E14     = The Ink cartridges whose destination are wrong
E15     = Ink cartridge is not installed E16 – Ink remaining is unknown
E16 -E19     = Failed to scan head alignment sheet
E22     = Carriage error
E23     = Paper feed error
E24     = Purge unit error
E25     = ASF(cam) sensor error
E26     = Internal temperature rise error
E27     = Waste ink absorber full or platen waste ink absorber full
E28     = Ink cartridge temperature rise error -
E29     = EEPROM error
E33     = Paper feed position error
E35 15     = USB Host VBUD overcurrent error – USB
E37 17     = Abnormal motor driver error
E40 20     = Other hardware error
E42 22     = Scanner error

7x orange 1x green = Problem: Black or Color cartridge trouble.
8x orange 1x green = Problem:  printer absorber full (Waste Ink Pad Full)
Solution: Reset the printer using generaltools or software Resetter. If not work

Rabu, 31 Oktober 2012

Printer Hp deksjet F380 matot alias mati total atau segala jenis deskjet lainnya kecuali Hp laserjet, tidak perlu direset, tidak perlu cek adaptor, tidak perlu ganti board apalagi beli printer baru, beneri sendiri mudah kok. Menurut pengalaman saya sebagai pengguna printer, merk printer hp paling enak dipakai, mulai dari tipe deskjet maupun lasejet printer.tidak rewel dan tidak pernah ngeselin, tidak repot bolak balik jalanin resetter printer untuk mereset segala macem, karena printer hp tidak perlu software resetter. Paling banter jika lampu kedap kedip sudah bisa ditebak masalah ada pada tinta warna atau tinta hitamnya, tinggal beli baru dan siap digunakan.

Untuk printer hp matot pun sangat jarang terjadi, seandainya ada itupun bisa dihitung pakek jari. Buat sobat yang ingin mencoba silahkan, yang penting sedikit hati hati pada saat buka tutup cover dan pemasangan kembali mekanik printer serta mainboard printernya.

Ikuti langkah berikut untuk memperbaiki printer hp deksjet matot, saya contohkan pada printer hp deskjet f380 yang matot :

1. Siapkan obeng kembang, Solderan dan timah,klo gak punya pinjem sama kawan atau beli di toko spare elektronik, obeng ini beda dengan kunci L walau mirip.

2. Siapkan dioda 1N4007 atau dioda satu ampere lainnya warnanya item, tapi yang paling baik yang 1n4007.

ganti dioda printer hp

3. Siapkan multitester atau Avo meter untuk mengukur, klo gak punya pinjem juga dengan teman.

4. Bongkar cover body printer, dengan membuka baut kembang yang ada dan dibuka dari atas.

5. Jika sudah terbuka baut kembangnya, angkat perlahan cover body printer hp deskjet F380 bagian atas,
    Nanti ada dua buah kabel tipis putih yang mengarah ke panel control printer.

6. Copot semua kabel tapi perhatikan bener sisi biru kabelnya yang mengarah ke panel atas, trus conektor ke motor dan paper feed. ( ada baiknya difoto dahulu dgn camera Hp sobat tiap detilnya jika sobat tidak begitu paham ) biar mudah saat pemasangan nantinya.

7. Lepas baut yang mengikat bodi mainboard printer, lalu angkat.

cara perbaiki printer hp matot

8. Lakukan pengukuran pada dioda persegi empat kecil seperti yang terdapat pada gambar.
caranya ngukurnya :

. Stel multitester pada x1
. Ujung kabel multitester yang berwarna merah ditempelkan pada ujung positif dioda ( yang list putih   pinggir dioda ) itu positif ( + ) dan ujung kabel multitester yang berwarna hitam ke sisi negatif ( - ) dioda. ( yang tidak ada list putihnya)
. Jika jarum menunjukan kearah kanan full itu tandanya dioda rusak..( jika ragu coba balik ujung kabel dari multitester yang digunakan untuk mengukur dioda, kabel merah pada jutub negatif dioda dan yang hitam pada kutub positif dioda ) jika tetap sama artinya memang dioda rusak.

9. Copot dioda yang rusak tadi ( ada baiknya diinget / dicatat /diberi tanda ) kutub positif dioda yang ada list putihnya dgn spidol atau apa aja yang penting gak kebalik. walau di mainboard juga sudah ada gambar posisi positif negatif nya.

10. Pasang dioda 1N4007 ( potong jika kaki kepanjangan ) dengan disolder, jangan lupa ujung dioda yang berwarna putih tandanya positif ( + ) harus menempel pada bekas dioda asli yang dicopot pada mainboard printer yang ada list putihnya ( + ).

11. Pasang kembali mainboard printer pada tempatnya dengan benar, jangan lupa dibaut.

12. Cukup colokan mainboard printer yang sudah dipasang dioda baru dengan kabel dari konektor adaptor, trus coba colokan adaptor ke sumber listrik, nanti lampu indikator akan berkedip kedip, jangan panik itu tandanya berhasil bukan minta direset ( cuma untuk mengetest klo printer hidup ) berkedip karena motor dan kabel lainnya belum terpasang, lalu lepaskan adaptor dari sumber listrik dan printer.

13. Pasang mekanik dan semua kabel yang mengarah pada mainboard printer. ( saat pemasangan mekanik : perhatikan plastik bundar yang mengarah ke sensor sebelah kiri ) posisinya menempel pada mekanik, dan harus masuk ditengah tengah sensor yang menempel pada mainboard printer.
 
14. Tutup cover body printer dan pasang kembali semua bautnya.

15. Selesai, nyalahkan printer sobat dan printer hp deskjet F380 yang matot tadi sudah siap dipakai.

Jangan buru buru waktu bongkarnya, gak rumit buat yang awam, ntar klo sudah biasa bongkar pasang akan lebih mudah. Cara ini bisa digunakan pada semua jenis printer hp deskjet matot ( mati total lainnya ) termasuk seri lama 2xxx dan sekenisnya. Selamat mencoba.

"Jika kita tidak pernah salah maka kita tidak akan tahu yang bener, jadi jangan takut salah dan jangan lupa perbaiki tiap kesalahan dengan hal yang bener, ingat menghindari diri dari kesulitan sangat dengan mendekatkan diri pada kegagalan" by : Cybermales.

Sabtu, 11 Agustus 2012

Arti Code lampu orange pada printer canon.

Service Call Errors (by LED Blinking in Orange and Green Alternately, or Lit in Orange)
LED alternate blinking
in orange and green Error [Error code] .
2 times Carriage error [5100] .
3 times Paper feed error [6000] Make sure paper is in the tray and nothing is blocking it.
4 times Purge unit error [5C00] .
5 times ASF (cam) sensor error [5700] .
6 times Internal temperature error [5400] .
7 times Waste ink absorber full [5B00] You have printed a ton of borderless pictures and the overspray has filled the sponge.
8 times Print head temperature rise error [5200] .
9 times EEPROM error [6800] .
11 times Carriage lift mechanism error [5110] .
12 times AP position error [6A00] .
13 times Paper feed position error [6B00] Sometimes it’s something simple like a hunk of paper stuck under the print head, another more radical trick is to turn the printer upside down and shake it. Be careful though you may spill ink or cause damage to the printer.
14 times Paper feed cam sensor error [6B10]0 .
15 times USB Host VBUS over current [9000] .
16 times Valve sensor error [6C00] .
17 times Motor driver error [6D00] .
20 times Other hardware error [6500] .
Continuous alternate blinking ROM error .
Lights in orange RAM error .
. . .
Semoga bisa membantu menganalisa kerusakan pada printer canon.
Buat resetter bias di lihat: http://printersiam.com

Senin, 30 Juli 2012

Buat sahabat blogger yang ingin mencari software tools resetter printer epson semua tipe bisa download disini, files berupa gabungan beberapa tools resetter printer epson dari model keluaran pertama sama yang terbaru tinggal dicocokin dengan printer yang akan diperbaiki.

Nama software tools resetter printer epson ini SSC service Utility terdiri dari beberapa versi, dari SSC utility 3.8, SSC utlity 4.0, SSC utlity 4.20 dan SSC utility 4.30. Jadi tinggal dicocokin saja sesuai merk printernya karena banyak yang tidak berhasil pada resetter printer epson dikarenakan satu tools untuk semua printer padahal beda printer beda versinya, nah klo yang ini tools paling komplit untuk semua printer epson, ada juga kok tutorialnya biar muda.

resetter-printer-epson

Dan ini list printer epson yang support dengan tools resetter printer yang ada dalam files download :

- Support for R270.
- Support for R240.
- Support for R340.
- Support for CX2800.
- Support for CX3900.
- Support for CX4900.
- Support for CX5900.
- Support for C58/C59.
- Support for RX640.
- Improved support for C2100/2200.
- Improved support for RX700.
- Improved support for R2400.
- Improved support for 785EPX/825/895/915.
- Some other improvements and bug fixes.
- Support for PM-970C.
- Support for PictureMate.
- Support for RX700.
- Support for R2400.
- Support for PM-A700.
- Support for PM-G720.
- Support for RX520.
- Support for CX7800.
- Support for CX4100.
- Support for DX3800.
- Support for CX3800/CX3810.
- Support for CX3700.
- Support for C67/68 and Photo Editions.
- Support for C87/C88/D88 and Photo Editions.
- Support for R220/R230.
- Support for R320.
- Support for CX4500.
- Support for CX3650.
- Various bug fixes.
- Ability to work with additional reset device.
- Support for CX4600.
- Support for CX5300.
- Support for CX5100.
- Support for RX420.
- Support for RX425.
- Support for RX620.
- Support for R1800.
- Epson Stylus Color 400
- Epson Stylus Color 440,
- Epson Stylus Color 480 LPT,
- Epson Stylus Color 480SXU / 580,
- Epson Stylus Color 600,
- Epson Stylus Color 640
- Epson Stylus Color 660
- Epson Stylus Color 670
- Epson Stylus Color 680 / 777
- Epson Stylus Color 740
- Epson Stylus Color 760
- Epson Stylus Color 800 / 850
- Epson Stylus Color 860
- Epson Stylus Color 880
- Epson Stylus Color 900 / EM-900C
- Epson Stylus Color 980
- Epson Stylus Color 1160
- Epson Stylus Color 1520
- Epson Stylus Color 3000
- Epson Stylus C20 / C40 / CL-750
- Epson Stylus C41 / C42 / C43 / C44 / C45 / C46 / C47 / C48
- Epson Stylus C50
- Epson Stylus C60
- Epson Stylus C61 / C62
- Epson Stylus C63 / C64
- Epson Stylus C65 / C66 and PE
- Epson Stylus C67 / C68 / D68 and PE
- Epson Stylus C70
- Epson Stylus C80
- Epson Stylus C82
- Epson Stylus C83 / C84
- Epson Stylus C85 / C86 and PE
- Epson Stylus C87 / C88 / D88 and PE
- Epson Stylus Photo RX420 / RX425 / RX430
- Epson Stylus Photo RX500 / RX510
- Epson Stylus Photo RX520
- Epson Stylus Photo RX600 / RX610
- Epson Stylus Photo RX620
- Epson Stylus Photo RX700
- Epson Stylus CX3100 / CX3200
- Epson Stylus CX3500 / CX3600 / CX3650
- Epson Stylus CX3700
- Epson Stylus CX3800 / CX3810 / DX3800
- Epson Stylus CX4500
- Epson Stylus CX4600
- Epson Stylus CX4100 / CX4200
- Epson Stylus CX4700 / CX4800
- Epson Stylus DX4200 / DX4800
- Epson Stylus CX5100 / CX5200
- Epson Stylus CX5300 / CX5400
- Epson Stylus CX6400 / CX6600
- Epson Stylus CX6300 / CX6500
- Epson Stylus CX7800
- Epson PictureMate
- Epson Stylus Photo
- Epson Stylus Photo EX
- Epson Stylus Photo 700 / IP-100
- Epson Stylus Photo 750 / PM-770C
- Epson Stylus Photo 780 / 790 / PM-780C
- Epson Stylus Photo 810 / 820
- Epson Stylus Photo 820
- Epson Stylus Photo 825 / 915
- Epson Stylus Photo 830 / 830U
- Epson Stylus Photo 870 / PM-875DC
- Epson Stylus Photo R200 / R210
- Epson Stylus Photo R220 / R230
- Epson Stylus Photo R300 / R310
- Epson Stylus Photo R320
- Epson Stylus Photo R800 / PX-G900
- Epson Stylus Photo R1800
- Epson Stylus Photo R2400
- Epson Stylus Photo 890
- Epson Stylus Photo PM-890C
- Epson Stylus Photo PM-A700
- Epson Stylus Photo PM-G720
- Epson Stylus Photo PM-970C
- Epson Stylus Photo 895/ 785EPX
- Epson Stylus Photo 900
- Epson Stylus Photo 925 / 935
- Epson Stylus Photo 950 / 960 / PM-950C
- Epson Stylus Photo 1200 / PM-3000C
- Epson Stylus Photo 1270 / PM-3300C
- Epson Stylus Photo 1280 / PM-3500C
- Epson Stylus Photo 1290
- Epson Stylus Photo 2000P
- Epson Stylus Photo 2100
- Epson Stylus Photo 2200 / PM-4000EPX
- Epson Stylus Pro 5000 / PM-5000C

Download Here

Senin, 11 Juni 2012

cara mereset printer canon mp287


Indikasi Kerusakan Printer Canon MP287 yaitu ketika printer MP287 dihidupkan dengan menekan tombol power  maka akan langsung muncul pada panel LCD kode Error E08. Dan ketika kita melakukan perintah cetak, maka layar printer tidak bisa mencetak dan akan ada pesan  monitor akan menampilkan Tulisan "Waste Ink Absorber Full". sebelumnya download dulu Service tools MP287 atau software untuk mereset printer canon MP287 : Here

Lalu ikuti langkah dan  Cara Reset Printer Canon MP287 Kode error E08

1. Canon MP287 printer harus dalam keadaan SERVICE MODE.

2. Matikan Printer Canon MP287 dengan posisi kabel power tetap terpasang di sumber arus listrik.

3. Tekan dan Tahan tombol STOP / RESET
4. Tekan dan tahan Tombol Power.
5. Lepas tombol STOP / RESET ( Tombol power tetap ditahan.)
6. Dalam keadaan tombol Power masih tertekan, tekan tombol STOP / RESET 6x (6 kali.)
7. Kemudian lepaskan kedua tombol secara bersamaan.
8. Kemudian MP287 Canon akan  berada dalam kondisi Layanan Mode.
9. Panel pada LCD MP287 akan kosong / gelap.
10. Ekstrak software Resetter Printer Canon MP287 yang kamu download.
11. Jalankan software tools resetter printer canon mp287.
12. Klik Main --> Patern, maka printer akan  mencetak satu halaman dengan tulisan "D = 000.0"
12. Klik "EEPROM Clear".
13. Kemudian klik "EEPROM", dan printer akan mencetak hasil Resetter MP258.     sebagai berikut :
     "TPage (COPY TTL = 00 000 = 00 000)"
15. Matikan printer Canon MP287 anda dengan menekan tombol power.
16. Lalu nyalahkan printer Canon MP287 anda, kode error E08 akan hilang dan printer canon anda kembali normal.


Selamat mencoba.

UPDATE :  24 Oktober 2013

Tools resetter Canon Mp287 Error P07 bisa di download  ..Download Here..

Selasa, 02 Agustus 2011

Berita Cara Baca Dan Maksud Kode Error Printer Canon MP145/MP160

kode error printer canon seri mp

E2-2 = tidak ada kertas (ASF)
E3-3 = Paper jam
E4 = tidak ada tinta/cartridge
E5-5 = ink cartridges tidak terpasang atau cartirdge yang terpasang salah (tidak compatibel)
E8 = absorber full, atau platen waste ink absorber full mita direset
E9 = hubungan ke digital camera / video camera tidak support
E14 = Ink cartridges whose destination are wrong
E15 = Ink cartridge tidak terpasang E16 - Ink remaining is unknown
E16 -E19 = masalah pada scan head alignment sheet
E22 = Carriage error
E23 = Paper feed error
E24 = Purge unit error (bagian pompa cleaning head)
E25 = ASF(cam) sensor error
E26 = Internal temperature rise error
E27 = ink absorber full or platen waste ink absorber full > reset dengan toolsnya
E28 = Ink cartridge temperature rise error -
E29 = EEPROM error
E33 = Paper feed position error
E35 15 = USB Host VBUD overcurrent error - USB
E37 17 = motor driver tidak normal
E40 20 = hardware lain error
E42 22 = Scanner error

CARA MERESET WASTE INK COUNTER CANON MP160/MP145

Sebelum mereset lihat dulu pesan error yang terdapat pada lcd printer anda :
cara dibawah ini digunakan untuk memperbaiki printer yang mempunyai pesan ERROR E27

1. Matikan printer(pastikan kabel power masih terpasang), tekan dan tahan tombol STOP/RESET kemudian tekan dan tahan tombol ON/OFF dan lepas STOP/RESET,
kemudian tekan tombol STOP/RESET 2x
2. Lepaskan kedua tombol, sekarang printer dalam posisi SERVICE MODE (pada LCD printer muncul angka"0")
3. Setelah lampu on/off berwarna hijau, silahkan tekan tombol STOP/RESET sesuai dengan petunjuk berikut:
di tekan 1x = lampu Orange nyala >untuk Service pattern print
di tekan 2x = lampu Hijau nyala >untuk EEPROM print
di tekan 3x = lampu Orange nyala >untuk EEPROM reset
di tekan 4x = Lampu Hijau Nyala >untuk Waste ink counter reset
4. Matikan printer dan cabut kabel POWER.
5. Hidupkan kembali printer anda.

Semoga berhasil.

Selasa, 15 Februari 2011

The R360 uses 6 cartridges with high durability ink which is designed not to fade and readily copes with all sizes and types of paper. This printer also equipped with 3.5 inch LCD screen and memory card slots to print without computer.

The adjustment program or software resetter for Epson R360.
download in here :
http://www.mediafire.com/?978movsy04cz2yd

Sabtu, 01 Januari 2011


To everyone who required resetter for canon MP198, MP258, MP276, MP496, MP558, MP568, and MP648 to reset ink counter on these canon printer model, I found how to reset these canon printers model on indoreset. Canon MP198, MP258, MP276, MP496, MP558, MP568, and MP648 is canon all in one printer verison that designed for home and small office.
I don’t know this reset method work or not on canon MP198, MP258, MP276, MP496, MP558, MP568, and MP648 because I don’t have this printer model to try this reset method.
Ready to reset your printer, follow the following steps:
All these steps must be done to reset your canon MP198, MP258, MP276, MP496, MP558, MP568, and MP648 printer.
A. Entering into service mode
  • Turn off the printer off is the printer power on. And remove the printer USB cable from your computer..
  • While the printer is OFF, press and hold the Start/Stop button on the some other canon printers model press Resume/Cancel button.
  • While still holding Start/Stop button or Resume/Cancel button, press and hold the POWER button.
  • When the POWER LED (green light) lit, release the Start/Stop or resume/cancel button (still holding the POWER button).
  • Still holding the power button,   Press the Start/Stop button or resume/cancel button TWICE then Release the POWER button. Wait until LCD printer to display 0 (zero) number
  • After the display is 0, attach the printer UDB cable to your computer, its will detected new device installed (its normal), now go to resetting steps
1. Run “service_tool 1050.exe”.
  • Confirm detected USB-port numbers on USB port column.
  • Click “Main button” on Clear ink counter section. Make sure there are papers in the paper feed because the printer will print after the process is complete.
  • Click “platen button” on the “Clear ink counter” section. The printer will print again.
  • Turn off the printer and then turn the printer on. You printer is ready for use.
Download Tools Disini:
http://www.ziddu.com/download/10241255/ServiceTool_1050.zip.html

How to Reset Counter Canon ip2770.?
This tutorial to answer all question all about software resetter Canon iP2770 and I hope this tutorial info can help all this blog visitors who need tutorial reset Canon iP2770.
Canon iP2770 is newest all-in-one canon printer that designed for Home and small office user can print with maximal resolution up to 4800×1200 dpi. This canon printer using cartridge type PG-810, CL-811 (PG-810XL, CL811XL Optional) and using Hi-Speed USB 2.0 interface to connected to computer.
Canon Pixma iP 2770 support for Windows 2000 (SP4 only), Win XP, Vista and Windows 7 and also support for MAC OS: Macintosh OS X 10.4.11 – 10.6.
Here the tutorial reset for Canon ip2770 (Click the picture below to view the tutorial – the tutorial are is English and Thai language)

Note: All Download link and tutorial is taken from Thailand printer forum (http://www.compute.co.th). Use this info and tutorial as your own risk.

Link to download disini:
http://www.4shared.com/document/yOdRVc-M/IP2770.html

Rabu, 24 November 2010


Before run adjustment program or software resetter Epson Stylus Photo R220 and R230, set date setting in your computer to 12 January 2006. Appearance of adjustment program Epson stylus photo R220 and R230 like adjustment program for Epson C45. Your Epson Stylus Photo R220 and R230 must be installed correctly in your computer before using the software otherwise so this software resetter will not be used.
Epson R220 and R230 using 6 Individual Intellidge Colour Ink Cartridges and this printer designed for photo printing. This printer has a very high resolution up to 5760 x 1440 dpi and allows photo quality printing.  It has parallel and USB interface to connected to computer and its compatible with Windows 98, Windows 2000, ME Windows XP and Macintosh.

Here how to Reset Epson R220 and R230 using the software
  • Download and extract downloaded software and run it.
  • Click accept button.
  • Set model name, port selection and destination setting and equal to your printer.
  • Click Maintenance Tab.
  • Check mark waste ink pad counter.
  • And the clear the protection counter (reset counter to zero)
  • Then click Ok, Ok
  • done
Download Adjustment Program Epson R220 – R230
Updated
If this software not work, you can also use SSC software to reset printer Epson R220 and Epson R230. the newest version of SSC software  (SSC ver 3.40) support for this printers.
The reset method work for canon printers that using PG-40 and CL-41 cartridges. After doing this reset method your printer will not display low ink notification anymore and will not show error code “E4″ or “E5″.
Here how, the method to reset ink level notification:
  1. Push “resume” for 5 seconds for canon IPXXXX. For canon MPXXX you must enter to service mode.
  2. Push Power switch then remove power cord.
  3. Insert plug power cord while pressing “power switch” at the same time.
  4. Push Start/reset by step 2 continue Wait display shown “0″
  5. Push + change display from “0″ to “1″
  6. Push color button 2 times
  7. Push Power switch again , Printer will print 1 page
  8. Open cover
  9. Unplug power cord
  10. Take out ink cartridge #40 and #41
  11. Insert plug again
  12. Push power switch
  13. Open cover (scan cover)
  14. Insert ink cartridge #40 and #41 again
Enter to service mode for canon MPXXX

  • With the printer powered off but connected to a power source, press the Power button while pressing and holding the Stop/ Reset button.
  • When the Power is lit, press the Stop/Reset button two times while pressing and holding the Power button.
  • When releasing the Power button and the Stop / Reset button (regardless of order), the printer will move into a service mode. (Waiting for menu selection)
Reset Counter MP600
  1. Turn off the printer
  2. Press and hold the Resume Button, add a printer an indicator light green.
  3. Press and hold the Power Button, while hold Power button, release the Resume Button.
  4. While hold the Power Button, double click Resume button and then Release Both Buttons.
  5. Click Resume for Four times.
  6. Once you click Power, to confirm the selected action (reset counter absorber).
  7. Turn off the printers.
Reset Canon MP600 to the Factory Setting
  1. Press the HOME button.
  2. Use the Easy-Scroll Wheel or the right/left arrow to select Settings, and then press OK button.
  3. Use the Easy-Scroll Wheel or the right/left arrow to select Device settings, then press the OK button.
  4. Use the Easy-Scroll Wheel (B) or the up/down arrow to select Reset settings, then press the OK button.
  5. Use the Easy-Scroll wheel or the up/down arrow to select Yes on the confirmation screen and then press OK.
  6. Press the HOME button to return to the HOME menu.

Selasa, 23 November 2010

  • Ikuti Perintah Berikut:
  • Press and hold STOP/RESET button.
  • Press and hold POWER button.
  • Release STOP/RESET button without releasing power button.
  • Click STOP/RESET two times and then release power button.
Now your printer enter into service mode. Next
  • Prepare paper on the paper tray
  • Press Stop/reset button for 1 times and then press power button, await till printer finished print.
  • Press Stop/reset button for 2 times and then press power button, await till printer finished print again.
  • Press Stop/reset button for 3 times then press power button to reset EEPROM.
  • Press Stop/reset button for 4 times then press power button to reset Waste Ink Counter.
  • Switch off the printer. if printer doesn’t turn off, press button power until printer off 

Reset procedure for Canon Pixma MP520,  procedure for resetting the Canon Pixma MP520 with button combinations. Some users in this forum which have tried this method (canon MP520 reset methode) say this method work on Canon MP520.

Here Procedure Resetting Canon Pixma MP520 
  1. Switch the printer OFF
  2. Press buttons 1 + 2 + 3 and 4 (simultaneously using four fingers)
  3. Keep pressing this four buttons for 10 seconds
  4. Release the On/Off button (number 4) (Keeping pressing the others)
  5. After a few seconds (when the printer go ON) you can release buttons 1, 2, 3
A litte Notes by BilBg:
  1. Maybe step “c)” is not needed
  2. This procedure was used when I refilled the Black cartridge – try using the ColorCopy button instead of BlackCopy button (number 1) if you refill Color cartridge.
  3. Maybe there is no need for all the four buttons – you can try 1 + 4, 2 + 4 or 3 + 4. (or 1+2+4, 1+3+4, 2+3+4)
 enjoy


Jumat, 29 Oktober 2010

This Reset methode using software resetter (adjustment program) for epson c90, c58, C67, c79, R270, R390, RX650, CX3900 has been tested. Some user reported view an message error on their computer when running the software reseter. If you see error message like “this program cannot be used”, “expired” or like that you shluld read the article “How to Run Adjustment Program for Epson Printers Whitout Error (for All Version)“to solve the error message.

To prevent error when running the adjustment program please read carefuly following instructions in order to run software resetter epson c90, c58, C67, c79, R270, R390, RX650, CX3900 without error, please Change your PC date setting to :
  • 1 Mar 2006 for Resetter Epson C67
  • 24 Jul 2007 for Resetter epson C90
  • 9 Nov 2006 for Resetter epson C58
  • 10 Nov 2006 for Resetter Epson C79
  • 18 Jan 2007 for Resetter Epson R270
  • 1 jan 2007 for Resetter Epson R390
  • 13 february 2007 for Resetter Epson RX650
  • 23 january 2007 for Resetter Epson CX3900
Download Free Software Resetter for Epson (adjustment Program for Epson) :
If any error when running Program Resetter, following this instructions :
  1. Delete the folder on “C:\Adjustments_Programs\Stylus XXX” on your PC.
  2. Open registry editor and navigate to : HKEY_LOCAL_MACHINE | SOFTWARE | EPSON | PTSG | Stylus CXX.
  3. Delete registry key “Stylus CXX or Stylus RXX” (note: XX is version of  software resetter)
  4. Close registry editor and then Reboot your PC.
To Reset Waste Ink Counter at Epson C58, C67, C79, C90, R270, R390, RX650, CX3900
  1. Extrac file Adjustment Program you was download
  2. Switch on printer
  3. RUN AdjProg.exe file for Epson Stylus C58, C67, C79, C90, R270, RX650, CX3900 from the extracted folder
  4. choose Particular adjustment mode
  5. Go to interview Then select waste Ink pad counter then click ok
  6. Klik initialization button to clear Waste Ink Pad counter to zero
  7. Once you press Initialize button, you can see its completion message, so that press OK button
  8. To Read Status Counter Press Read button, you can see the current counter value.
  9. Turn off the printer for 5secs then turn again
  10. After you the reset successful, you can change the date setting back to normal again
Here this step to Reset Waste Ink Counter Printer Epson R240 – R245 – R250
  1. Download Adjustment program for Epson R240 – R245 – R250
  2. Switch on printer
  3. Change the date on your PC to 15 February 2006
  4. Run adjprog.exe from the extracted folder
  5. Click accept
  6. Click particular adjustment mode
  7. Go to maintenance then Select waste ink pad counter then click ok
  8. Click on “check button till its done then click on initialization button then click on finish button
  9. Switch off printer for 5 secs then switch on again
  10. After you reset succesfully you can change the date back to normal
Manual reset methods several EPSON Stylus Color. Actually there are two methods  to reset epson printers counter, that is using software resetter such as adjustment program or SSC service utility or using manual by combination pressing button on the printer. If Reset using software resetter you can follow the way of usage the software but sometimes software resetter for the printer is not available. The only way to reset the printer if software resetter not available you can use manual reset.
The Following manual reset for some EPSON Stylus Color Printers:
1. EPSON Stylus Color
  • Pressing and holding ALT+FONT+LOAD+PAUSE buttons combination
  • press POWER button
  • Release all buttons
2. EPSON Stylus Color 300
3. EPSON Stylus Color 400, 600

  • Pressing and holding LOAD/EJECT and CLEANING buttons
  • press POWER button and hold it until you will see blinking INK OUT and PAPER OUT leds
  • Release all buttons
  • In 2-3 seconds time press LOAD/EJECT and CLEANING buttons again.
4. EPSON Stylus Color 440, 640, 740, 460, 660, 670, 760, 860, 880, 1160
  • Pressing and holding LOAD/EJECT and CLEANING buttons
  • press POWER button and hold it until You will see blinking INK OUT and PAPER OUT leds.
  • Release all buttons.
  • In 2-3 seconds time press and hold CLEANING button, until all leds will blink.
5. EPSON Stylus Color 680
  • Pressing and holding LOAD/EJECT and CLEANING buttons,
  • press POWER button and hold it until You will see blinking INK OUT and PAPER OUT leds.
  • Release all buttons.
  • In 2-3 seconds time press and hold LOAD/EJECT button, until all leds will blink.
6. EPSON Stylus Photo 785, 895
  • Pressing and holding Maintenance and Roll Paper buttons
  • press POWER button, You will see blinking Error led.
  • Release all buttons.
  • In 2-3 seconds time until led is blinking press and hold for 10-12 seconds Roll Paper button, until all leds will blink.
7. EPSON Stylus Photo 890, 1280, 1290
  • Pressing and holding Maintenance and Roll Paper buttons, press POWER button, You will see blinking Power led
  • Release all buttons
  • In 2-3 seconds time until led is blinking press and hold for 10-12 seconds Roll Paper button, until all leds will blink
  • In 2-3 seconds time press LOAD/EJECT and CLEANING buttons again.
8. EPSON Stylus Color 800, 850
  • Pressing and holding LOAD, CLEANING Color and CLEANING Black buttons
  • press POWER button and hold it until You will see blinking INK OUT and PAPER OUT leds.
  • Release all buttons.
  • In 2-3 seconds time press and release CLEANING Color button, You will see leds blinking.
9. EPSON Stylus Color 900, 980
  • Pressing and holding LOAD/EJECT and CLEANING buttons
  • press POWER button, You will see blinking INK OUT led
  • Release all buttons
  • In 2-3 seconds time press and hold CLEANING button for 10-12 seconds.
10. EPSON Stylus Color 3000
  • Pressing and holding PAUSE, LF/FF and DOWN ARROW buttons
  • turn on printer.
  • Release all buttons.
Get an error 21000068 when resetting your Epson T50 or Epson T60 and not see  any solution to prevent the problem. Why not try this tips, but reset this method not recommended for beginner user and you must understand what you are doing. These tips from Jagdish Rathore (India) and I have been granted permission to publish on this blog. He also has been publishing this reset method on his blog on:
http://www.epsonservice.blog.com/. If you do not have any knowledge about PCB and electronics, I recommend don’t try this reset methode.
  1. Open your Epson main PCB board.  You can view an 8 pin CMOS IC.  That is Epson waste ink counter IC and found on all Epson Printer.
    step 1 T50 -T60 resetting
  2. You can reset your printer without any resetter by following these ways.
  3. Soldering pin no 1,2,3,4 by wire  as show in PICTURE and now turn on printer for ”20 second”
    step 2 T50 -T60 resetting
  4. After 20 second turn off printer  and remove soldering wire from pin no. 1,2,3,4 ( back in original condition)
  5. Now turn on your printer
  6. And now your printer will be RESET
Note: This method is not recommended for beginners so you have to understand what you are doing. All problem caused by this tutorials is not our responsibility. Use this tutorial as your own risk.

Arsip Blog

Visitor

Popular Posts

Donate To Me On Paypal

https://www.paypal.me/riyanto1971